Autumn Elegance: A Chambray Reglisse

Ever since I began sewing again last fall, I have loved pretty much everything from the French pattern company Deer and Doe, yet for some reason I’ve been too scared to make their dresses. Skirts, and even jackets, sure, but dresses? Eek. I’m not really sure why I have this phobia – they’re just too cute, it’s too good to be true if they’re easy, too? Maybe something like that. Anyhow, during my final days in Boston I did some pretty serious binge-shopping at Grey’s Fabric, including several Deer and Doe dress patterns, so now I have no excuse not to make them. It was time to take the plunge!

Another thing I bought during my Grey’s binge was some lovely Robert Kaufman dot chambray, which I immediately knew I wanted to make into a Reglisse dress. The full skirt, the neck ties, and the adorable silhouette have been calling to me for some time now, so I finally gave in. Of course, even after purchasing the pattern and the fabric, it took me a while to gather up the courage to actually sew the thing. But I finally did!

IMG_1496.JPG

IMG_1493.JPG

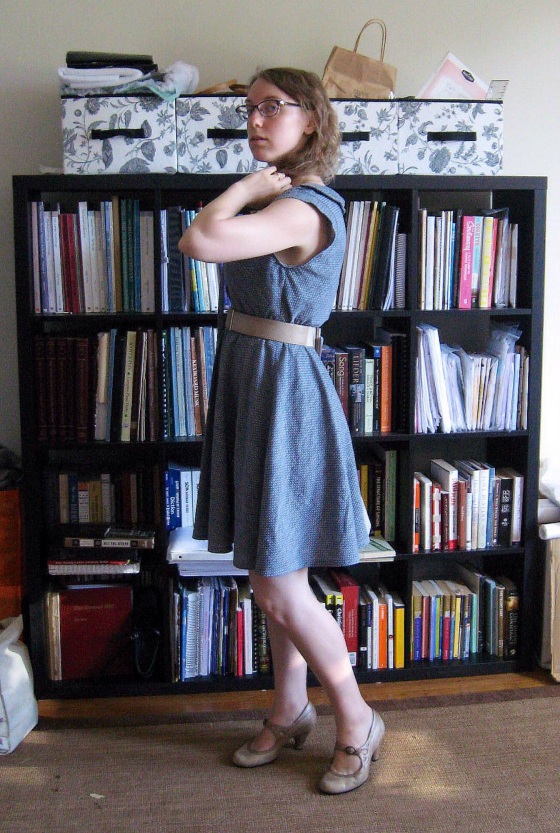
…and I love it!! It’s such an easy dress to wear, with the elastic waistband and loose fit, and yet it still feels so elegant I think it counts as “dressing up.” Sewing up the dress did have its challenges, of course. As an intermediate level pattern, the dress features a bias cut top, and has minimal instructions to boot, so I had my work cut out for me.

One of the big challenges for me was figuring out how to finish the seams. The fabric is a bit deceptive, which made it tricky. It looks and acts like a typical medium weight chambray, but it’s actually quite a light fabric! Serging just one layer of this fabric on the bias turned out to be a hot mess – the fabric was just too light weight, and the dot weave plus the bias edge meant that there were little threads poking out everywhere. With the help of my trusty Sewtionary (seriously, y’all, I can’t live without this book!!), I determined that the best way to finish the seams on the bias-cut edges was to turn them under and stitch:

IMG_1506.JPG

When I was working with two or more layers of fabric, the serger did fine, so I used a three-thread overlock stitch for those sections:

IMG_1507.JPG

I also used bias tape to hem the dress, as recommended in the pattern. I hadn’t done this before, but I loved the technique – it made hemming the deep curve of the circle skirt so much less painful! It also provides a little bit of body to the skirt, which I love.
IMG_1500.JPG

IMG_1497.JPG
(Necessary back and side views)

Now that the dress is made, my big question is: to belt or not to belt?? At first I liked it better with the belt, but I feel like it hangs better without. What do you think?

IMG_1499.JPG

IMG_1502.JPG

Anyhow, I love that this dress is light and flowy, and yet the fabric choice still makes it feel like fall. And luckily, it’s still warm enough here to wear it! I have to say, I’ve taken quite a liking to San Francisco weather 8). Call me spoiled…

Made Marion

Hahahaha aren’t I so punny?? Ouch, I know. Sorry ’bout that, y’all…but when you’re writing about Andi Satterlund’s Marion Cardigan Pattern, how can you resist? Anywho, I’ve been following the Marion Knit-Along for the last month, and am quite proud to announce that I managed to finish on time! With a few days to spare, in fact. Take that, productivity!

I’ve actually been wanting to make thing pattern for a while – I love v-necks, cables, and button-down cardigans – so I had purchased the pattern before I even knew about the KAL. However, the knit-along was what finally give me the kick in the bum I needed to get moving. I initially starting knitting it when I was stuck in Sunnyvale with no sewing machine, so knitting was my only outlet for craftiness. As you can imagine, at that point, my knitting was flying along at a rapid pace! However, after the sewing machines moved back in, the project went to the back burner for a while.

It didn’t help that, when I finished the waist decreases and tried it on before starting the ribbing at the bottom, I discovered that I had knit with a ridiculously loose gauge, and the sweater was WAY too big. Hmph. I briefly thought about trying to adapt the pattern to my current gauge, but quickly realized that the resulting cardigan would still be too big and lumpy, so I ripped back all the way to the shoulders. That’s over half the sweater I had to rip out and wind back into neat little balls :P. It was surprisingly therapeutic, though – nothing like being able to legitimately punish your work without ruining it!

Anyhow, I’m very happy that I made that decision, as the final fit is much better. I still think the gauge might be a tad off – I have a feeling the yarn I used isn’t quite hefty enough for the project, as the fabric it created is still pretty loose and the stitches aren’t as even as I would like. I used the recommended yarn – Knit Picks’ worsted Wool of the Andes – but next time I might try something different. We’ll see.

But enough talk! Here it is!

IMG_1483.JPG

IMG_1485.JPG

I’m not 100% sure I made the right size – I can never quite figure out if my sweaters are too big or if they fit correctly. I guess that’s up to personal preference, but I can’t make up my mind! I made a size small, which should give me 2.5″ of negative ease through the bust, but it feels a bit roomy through the underarm/boob area. Hmmmm.

IMG_1486.JPG

As a nice finishing touch, I used Petersham grosgrain ribbon to reinforce the button bands, as Lauren explains in her fab tutorial here. Even though it made the process take longer, I’m quite happy with the result, and am even considering going back to my old cardigans and retro-fitting them with some ribbon :P.

IMG_1490.JPG

The buttons are my first-ever purchase from Britex! I have to admit, it was a little intimidating going into that store, but the gal who helped me at the button desk (SO MANY CHOICES) was very helpful and nice. I was initially thinking of going for a contrast, but I really love these understated buttons I ended up with. They’re the perfect neutral for this sweater.

I’ve already worn the sweater several times, and I’m starting to realize that this is the ideal garment for San Francisco! It’s warm but breezy, so as you heat up from a long stroll commuting to work, it breathes more than a jacket or coat. It’s funny how a different city can affect your fashion choices! Have you ever found that your tastes changed with a change of location?

IMG_1484.JPG

Rawr! Finishing this cardigan got me feeling so feisty about knitting that it actually inspired me to finish another long-awaited project – coming soon!

Testing, testing, 1, 2, 3!

Wow, it’s been a million years since I blogged! I’m still trying to figure out the “rhythm” of my new San Francisco life, and while I’ve been doing a great job of, say, knitting and running, I’ve really been slacking on blogging and, weirdly, sewing. For some reason my sew-jo has really taken a hit with this move, and I’m still trying to get back into the swing of things.

However, one of the projects that really motivated me to get sewing again was my first opportunity to test a pattern! I’ve been wanting to take part in pattern testing for a while, so when Katy and Laney put out the call for pattern testers, I enthusiastically volunteered. Pattern testing was a bit of a scary process for me – I usually like to research a pattern before starting out, seeing how the design works in different fabrics and on different bodies, as well as learning about common problems or alterations, so I really felt like I was going into this process blind. I think that was really good for me, though – it forced me to use my own critical thinking skills to think through fit, fabric, and construction instead of relying on the internet to answer all my questions.

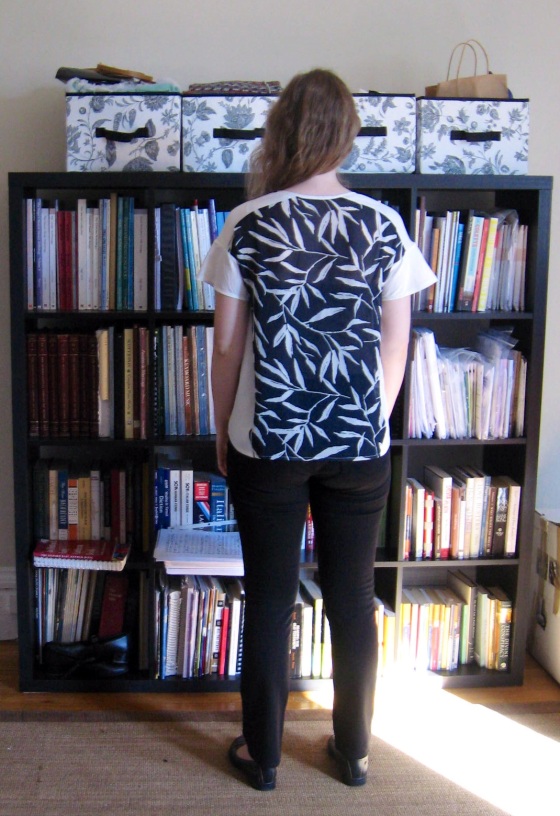
That being said, I now present to you…*drumroll* the Geometry Top! This loose-fitting top is surprisingly figure-flattering, with angled side insets that create the illusion of an hourglass figure ( and believe me, I need all the help I can get in that department!).

IMG_2180-0.JPG

I sewed up a size 4 with no fit alterations, though I may lengthen it a bit next time. Although my measurements pretty much exactly fit their size 4, I was considering going down a size, since super loose styles tend to make me look like I’m wearing a sack. I’m very glad I stuck with my correct size, though; it’s actually not too roomy – just the right amount of drape – and fits fabulously through the shoulders (something that’s pretty important to me as a pianist!).

IMG_2183.JPG

IMG_2178.JPG

Although it’s a simple style, the pattern level is listed as “intermediate,” which I think is very appropriate – the bias side seams can be a bit tricky if you’re not used to them, and the slippery fabrics recommended can be finicky. That being said, this is a great way to bridge from beginner to intermediate, so don’t let it scare you! If you’ve been wanting to experiment with drapey fabrics but have been afraid of a bigger, more involved project, this is the perfect pattern for you.

Speaking of fabrics, let’s talk about that, shall we? I went the classic Sound of Music route and made mine out of a curtain and a bed sheet :P. Yup, that’s right! I didn’t have very many drapey fabrics in my stash, so I got creative. The sheet is a lovely sand washed silk with a nice medium drape, and the curtain is some sort of polyester chiffon, most likely. I started out trying to make the pattern from a cheap polyester satin back crepe, which was a total disaster. The fabric didn’t have the proper amount of drape, and just hung like a sack. It was a classic case of the fabric not fitting the pattern, and I ended up abandoning that version. So just be sure your fabric really is nice and drapey. Don’t be afraid of silks and rayons! They are your friends for this project :).

So, that’s the Geometry Top! My version blogged here used the test pattern, and a few alterations were made since testing (mostly with the sleeves and the neckline), so I hope to have a second version up soon with the finished pattern.

Congratulations to Katy and Laney for another fabulous pattern! They really are inspiring gals, both in the blogosphere and in real life, and it’s been a pleasure getting to know them!

IMG_2188.JPG

WINNING!

New City, New Pattern

After weeks of waiting, my machines finally arrived last weekend! It has been a joyous reunion, although the going has been slow, as we are still unpacking the multitude of belongings that showed up on our doorstep last weekend. However, I am happy to get to show off a brand new make, and my first finished project sewn in San Francisco – the Sewaholic Yaletown Blouse!

I knew for a while that I wanted to make this pattern right away after getting my machines back – the loose fit meant that I wouldn’t have to fiddle around with too much fitting, and the elastic waist would be forgiving on my recently expanded waist measurement. I decided to start out with the blouse version as a “wearable muslin” before jumping into a full dress, just in case it needed some adjusting. I didn’t make any fit adjustments this time around, and I think it turned out pretty well!

IMG_1474.JPG

IMG_1473.JPG

(Apologies for the grainy photos – I’m still figuring out where is the best place to take photos in the new apartment.)

The style is a little on the blouse-y side for me, but I still like it. I’ve been really into peplum tops recently, so I was glad to add another to my collection.

IMG_1475.JPG

IMG_1476.JPG

The project came together very quickly – just an afternoon plus a morning! I followed along with Caroline’s sewalong on the Sewaholic blog, which had some nice tips, including a way to make polished, professional looking thread loops. I always love learning new techniques, so I appreciated those details!

The fabric I used was a drapey polyester inherited from my mom. I couldn’t quite get the grain to straighten when I was preparing the fabric (another reason I made a top instead of a dress!), but I don’t think it’s too noticeable. I’m also not 100% in love with this silhouette on me – a little on the muffin-y side, perhaps. What do you think?

But most importantly, I MADE A THING, y’all!! It feels soooo good to finally be sewing again, and I can’t wait to get to work on more projects. I have so many in mind already!